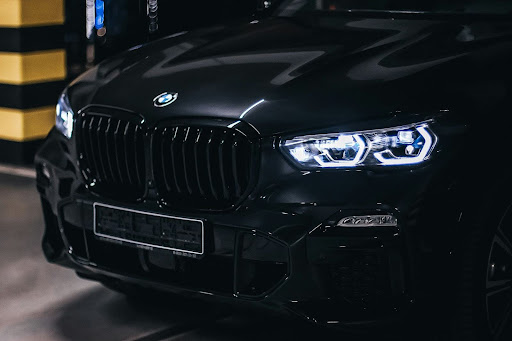
In this guide, we’ll unveil the secrets to enhancing your vehicle’s aesthetics and comfort by installing car window tints. Discover the step-by-step process for a successful DIY installation journey.
Understanding Car Window Tints
Car window tints, thin films applied to car windows, offer multiple advantages. They block UV rays, reduce heat, enhance privacy, and add style. Various types, such as dyed, metalized, and ceramic, cater to different needs. However, it’s essential to be aware of local legal regulations regarding tint darkness, as exceeding these limits can lead to penalties. Understanding these fundamentals is crucial before diving into the installation process.
Easy Way: Go For Professional Tint Shops
If you’re not up for the DIY adventure or want a flawless finish without breaking a sweat, the easiest route is to hit up a reputable window tint shop. These folks are the pros, the tinting wizards who’ve got the experience and the knack to make your car windows look amazing. Just search for a local shop with good reviews, give ’em a call, and set up an appointment. It’s hassle-free, and you can relax while they work their magic, leaving you with professionally tinted windows that’ll make your ride cooler in more ways than one.
DIY: Tools You Need
If you’re feeling adventurous and want to tackle the tinting project yourself, you’ll need a few essentials. First, you’ll want to have the tint film that suits your preferences and needs. Additionally, make sure you have the following tools on hand:
- Tint Film: Choose the tint film with the desired shade and type.
- Window Cleaner: A high-quality window cleaner to ensure a clean surface.
- Squeegees: Both soft and hard squeegees for smooth application.
- Razor Blades: To trim and shape the tint film.
- Heat Gun: Used for heating and shrinking the film for a perfect fit.
- Lint-Free Cloths: For wiping and cleaning during the process.
Step-by-Step Guide to Installing Car Window Tint
Installing car window tint can be a rewarding DIY project. However, it requires precision and patience to achieve a professional finish. Follow these detailed steps for a successful installation:
Step 1: Gather Your Tools and Materials
– Assemble all the necessary tools and materials listed in the previous section.
– Ensure that your workspace is clean and free of dust to avoid imperfections in the tint film.
Step 2: Measure and Cut the Tint Film
– Measure the dimensions of the window you’ll be tinting accurately.
– Cut the tint film to the appropriate size, leaving an extra inch or so on each side for margin.
Step 3: Clean the Window Thoroughly
– Spray the window with a window cleaner and use a lint-free cloth to wipe it clean.
– Make sure there is no dirt, debris, or streaks on the window’s surface.
Step 4: Prepare the Tint Film
– Carefully peel the backing off the tint film.
– Wet both sides of the film with a soapy water solution (a few drops of dish soap in a spray bottle of water).
Step 5: Apply the Tint Film
– Position the wet tint film onto the window, aligning it with the edges.
– Slide the film into place, ensuring it covers the entire window surface.
Step 6: Squeegee Out Air Bubbles
– Starting from the center, use a soft squeegee to push out any air bubbles and excess water towards the edges.
– Be patient and work methodically to eliminate all bubbles.
Step 7: Trim the Excess Film
– Use a sharp razor blade to carefully trim the excess tint film along the edges of the window.
– Ensure clean, straight cuts for a neat appearance.
Step 8: Heat and Shrink the Film
– Use a heat gun to heat the tint film. Begin from the center and work towards the edges.
– This process helps the film conform to the window’s contours. Be cautious not to overheat.
Step 9: Squeegee Again
– After heating, use a soft squeegee to press the film against the glass once more, eliminating any remaining water or air bubbles.
Step 10: Final Inspection and Cleanup
– Carefully examine the tinted window for any imperfections, bubbles, or creases.
– If necessary, use a heat gun and squeegee to fix any minor issues.
– Clean the tinted window’s exterior with a lint-free cloth and a non-ammonia-based cleaner.
Step 11: Curing and Drying
– Allow the tint film to cure for at least a few days. Avoid rolling down the windows during this time.
– The curing process allows the adhesive to set and ensures long-lasting results.
Step 12: Enjoy Your Tinted Windows
– Once the tint film is fully cured, you can enjoy the benefits of your professionally-looking tinted windows.
Window Tinting Rules
Window tinting regulations vary by country and even within different states or regions. To avoid potential legal issues, it’s essential to familiarize yourself with the rules governing tint percentage in your specific location. In the United States, for instance, each state may have its own guidelines regarding the permissible Visible Light Transmission (VLT) percentage for vehicle window tints. Before purchasing tint materials, research and adhere to these regulations to ensure your tints comply with the law. Staying informed helps you enjoy the benefits of window tinting without any unwanted legal repercussions.
Take away
Car window tinting, whether professionally installed or done as a DIY project, can significantly enhance your driving experience. From protection against harmful UV rays to improved privacy and aesthetics, the benefits are undeniable. However, it’s crucial to understand the specific regulations and rules regarding tint darkness in your area to stay on the right side of the law.
Whether you opt for the ease of professional installation or embark on a DIY journey, with the right tools and knowledge, you can enjoy the many advantages of tinted windows while ensuring compliance with local regulations. So, go ahead, explore the world of window tinting, and elevate your car’s style and comfort to a whole new level.
Written by:
Steven Hopkinson
Steven Hopkinson, a distinguished figure in the automotive industry, co-owns Flying Window Tinting alongside his father, Sean. Renowned as Orlando’s premier auto window tinters, their 40 years of expertise reflect their commitment to excellence. With a passion for sharing knowledge, they empower car owners to achieve their desired tints, setting a benchmark of professionalism and skill.